How to get teachers on board with technology – Tech Tip Tuesday

Not everybody likes technology as much as I do. In fact there aren’t that many that do.

My twitter feed leans heavily towards educational technology. I subscribe to blogs geared specifically towards edtech. I often disappear down “google rabbit holes” looking for something and then finding another. I get incredibly excited when I find out about new apps, websites or technology.

I’ve curated my online life to provide me with a drip, drip, drip of educational technology ideas.

dripping tap.gif
But I understand that not every teacher has the same strange hobbies that I do.

As a technology coach in a school of 130 teachers, I wanted to find a way to provide the same drip of tech knowledge that I find so useful. So….

onboard-feature-image


The idea is simple. A short email automatically sent each Tuesday morning at 6am. The goal of which is to build an awareness of educational technology and how it can, and is, being used in real classrooms.

The emails are loosely timed to coincide with the stage in the learning cycle. Right now we’re moving in towards the end of the term, so the tech tips are focused on revision and consolidation of knowledge.

The emails always have the “testimonials”. See below for what one of these testimonials looks like.
kahoot_censored.jpg

faces blurred to protect the awesome.I find these testimonials help so that teachers know that it’s not just the “tech coach” guy saying it’s a great idea. Actual teachers, from our own school, are using the tool or technique and are really enjoying it. I find the testimonials they write are always enlightening as well. They show HOW and WHY they are using the tool in a real educational setting.

After the introduction and the testimonials, comes the video tutorial on how the technology works. It’s always 3 minutes, no longer, as teachers just don’t have that much time. I work really hard to keep these videos short. If you watch the video below, you’ll see what I mean!


After that, all tech tips get added to the “tech tip tuesday database”, a website that teachers can access anytime they’re thinking… “what was that tech tip from 3 months ago?”

It’s PD in small, bite-sized pieces.

If a teacher watches every tech tip tuesday video in a year, that’s:

  • 40 new edtech ideas
  • 2 hours of video PD
  • 1 teacher who’s now on board with technology.Onboard with technology.gif

The Controlled Chaos Classroom – A Choose your own Adventure Vlog

Controlled Chaos Classroom.PNG

My classroom is probably best described as controlled chaos. Some students are working individually, some are in small groups, others are watching a video, another is doing a diagnostic exam. It’s flipped mastery and it’s really about letting go.

In this little video experiment I attempt to capture a little of the “Controlled Chaos” that is my maths class. It’s a “choose your own adventure” video. At the end of each short clip, click the box you want to follow. I’ve been wanting to do this for a little while and got a little nudge from Adrian Camm last week at the “Leading a Digital School” conference.

Click the video and get ready to “Choose Your Own Adventure”.

Better Classroom Observation: How to Break Down a Door

door kick down.jpg

In the beginning of my career I had some pretty rough classroom visits. I can talk about them because I’ve since moved on and  nobody will get their feelings hurt.

Classroom visit:
The head of department visited my classroom for the first 8 minutes of my lesson. In the debrief later that week, he said “It looked ok. I didn’t really see any evidence of differentiation though.” When I asked how I would differentiate in the first 8 minutes of a lesson, he wasn’t really sure.

Classroom visit:
Two deputies came into my room with a video camera and pressed record. They filmed me teaching, the students and the students’ books for about 15 minutes. Then they left. 5 years, later, I still haven’t seen that video and have no idea what the purpose of it was.

Classroom visit:
The Principal wanted to decide whether to renew my contract for the following year. So, with 3 weeks to go in the school year, he visited my classroom to make his judgement. He decided it was “ok” and I could stay on.

After these classroom visits, I only wanted to do one thing.

safe door.jpgClassroom door, Locked down.

Needless to say, each of these classroom visits left me feeling worse than before it took place. They all occurred in the first 3 years of my teaching career. They very nearly ended my teaching career.

Then I moved schools.

There I met a giant of a man, both figuratively and literally. He was in charge of “Teacher Development and Performance” and asked if he could visit my class. He came in for the full lesson, took plenty of notes and then left, with a debrief already organised for the next day.

In the debrief he said the lesson was GREAT! He listed a multitude of things I’d done well. He couldn’t have been more complimentary. When he asked me how I thought the lesson went, I listed the things I could have done better. He asked me how I could have done them better and I told him. He said that was great reflective practise and sent me out of his office ready to conquer the world.

It was here I saw the value in the positive classroom visit. And my classroom door…


Grey-welcome-mat-with-written-welcome-sign-on-itCome on in.

The Problem I Have With Most Models of Observation

Thankfully, everyone agrees that classroom visits shouldn’t look like those I experienced in my first 3 years of teaching. But…

So many classroom observational models start with this assumption:

“There is something wrong with your teaching. Through observation we can help you fix it.”

In “teacher-directed models”, we are kind enough to let the teacher tell us what their deficit is before we walk into their room. This is supposed to make them feel like they own their own professional development.

What then happens is we walk into the class and focus intently upon their deficit, the thing they consider their weakness. Then we’ll offer all sorts of great suggestions for them, based on the entire 60 minutes we were in their classroom!

A Better Way
Instead of starting from the assumption that there’s a deficit, why don’t we start with a different assumption.

“Every teacher in our school does great things in their classrooms. We should visit each others’ classrooms and see those fantastic things in action!”

Imagine, if every teacher in your school was being told, once a week (or fortnight or month, as often as you can), by a visiting teacher, “wow, I really like the way you did that. I’m going to try that in my class”.

The teacher who got visited feels great.
They’ve received a compliment on their teaching and they’re ready to go again. They’ll gladly have another visitor in their classroom any time.

The visiting teacher feels great.
They learned a new skill. They are certain they can adapt it and use it in their own classroom. They’d love to do another classroom visit, maybe they’ll learn something else fantastic.

Now multiply this across your entire school.
Every time a teacher visits another classroom they get another great idea. Without ever mentioning a teacher’s “deficits”, they’ll soon be rid of them anyway. They’ll be exposed to great teaching practice over and over and over again. They can’t help but get better with each visit.

Everyone is having a great time. Visits only ever mean compliments and new ideas. Two of any humans favourite things.

What you’ll soon have are classrooms with open doors.

“Great”, I hear you say. “Now that we’ve tricked them into opening their doors, we can start doing the proper classroom visits. The ones with targeted areas for self-improvement”.

No.

Positive classroom visits aren’t a gateway leading to something better. They ARE the something better.

Nobody Likes Change. Everybody Loves Improvement

“Yes, but what do you do with the resisters? You know, the people who hate change?”

Here’s the secret.

EVERYONE HATES CHANGE!

Story Time
I want you to imagine you’re a caveman. You’ve found yourself a nice cave to live in. In a nice fertile part of the countryside. Plenty of nuts and berries around and you’re up nice and high so you can see danger approaching from a long way off.

Suddenly your friend says, “Maybe we should move caves. I’m sick of this one, I feel like a change”.

You politely decline because you hate change. He goes off without you to find a new cave.

…And then he gets eaten by a sabre tooth tiger!

sabertooth tiger.jpgYep. This guy ate your friend.

You lived because you hate change. Now you get to have little cavebabies and pass on your change-hating genes. They will pass on their change-hating genes, and so on forever and ever.
THE END

 But… if everyone hates change, how did the cavemen become… us?

Well, we might hate change, but everyone I’ve ever met LOVES improvement.

Nobody like change
One Model T Ford, coming up

Every teacher I have ever met, without exception, loves improvement. They love when their students improve, the weather improves, when their football team improves.
People. Love. Improvement.

If somebody in your school is resisting change, they are right to do so. Because change gets you eaten by a sabre tooth tiger.

But I can guarantee that nobody in your school will resist improvement.

“But IT IS an improvement and they’re STILL resisting” I hear you say.

Then it’s time for you to do some of this.

Retro-salesman-e1367455001858.jpgOrder now and get free steak knives

Really take the time to communicate the improvement. How does this improve my practise?

  • Does it make my life easier as a teacher? (Because every teacher will buy that!)
  • Does it make my students’ life better? (Because every teacher will buy that!)
  • Does it make parents happier? (Because every teacher will buy that!)

If the change you’re selling doesn’t hit any of these marks, then what you’re selling isn’t improvement. You should rethink what you’re trying to change.

Because change without improvement gets you eaten.
sabertooth tiger

10 Ways To Use Video in Your School

Why use video?
They say “a picture is worth a thousand words”. So, at 24 frames a second, a 2 minute video is worth 2,880,000 words.

So, without further ado…
ten ways.PNG

10. Subject Selection Evening.
Every year, parents pile into schools to hear about the subjects on offer. Teachers speak to large groups of parents and students about what the subject is, then everyone goes home.

At my school, every head of faculty makes a subject selection video which parents and students can watch in the comfort of their own home.


Slightly more arty than most.

We still have subject selection night. We just use that face to face time differently. Parents and students come in and have conversations with our staff, having their specific questions addressed.

9. Professional Development
It seems strange that often in schools teachers all undertake the same professional development. Given the diversity of teachers, any blanket PD is very unlikely to cater to all teachers.

Instead, why not use video to provide on-demand professional development to staff. I recently implemented “tech tip tuesday” emails at my school. An email to all teachers with a short, 3 minute tech tip.

Teachers can choose when and whether they watch it. If they do choose to watch them, over the course of a year that’s an “incidental” 2 hours of PD!

8. Assignment explanations
As teachers, when we hand out assignment pieces, often we spend quite a bit of time going through, as a class, exactly what is being asked of us.

Why not record your assignment explanation. Students can refer back to it later in the assignment to make sure they fully understand the task, parents can view it and students who may have been sick on “hand out day” can also watch the video.

7. Emails to parents
Often, great care needs to be taken when writing an email to parents.  We need to be careful with the wording, making sure that what we are trying to say is being perfectly conveyed by the words we type.

Why not make them a video. You can convey a lot with your facial expression and tone of voice that just isn’t possible in an email.

6. Technical Help.
Sometimes you’ll get an email from a student, parent or fellow teacher asking for technical assistance. Maybe they can’t figure out how to login to something or can’t find the correct sequence of things to click on a website.

You could write them a long drawn out email describing it all. Or…PD gif.gif

5. The repeater
Do you have a lesson that you teach over and over, year after year. For instance, every english teacher has taught TEEL/PEEL paragraphs perhaps more often than they care to remember. Then just when you think you’ve nailed it a student asks, “what’s a TEEL” paragraph?

Having a repeater video means that students can refer back to it again and again. Because our memory for video is strong, after the first 5 seconds of playback, students will say “oh yeah, I remember this…”

4. Meetings
If you’ve scheduled a meeting with an individual or a small group to propose something to them, or to report on something, consider sending them a video of your proposal/report in advance.

This means that in the meeting, everyone can start discussing the proposal productively, rather than hearing it for the first time. A meeting is much more productive if everyone is on the same page before it starts.

3. More Meetings
Are your staff meetings collaborative events? Or are they “chalk and talk”, with one person standing up the front transmitting information.

If they are the first type, good for you. If they are the second type, consider cancelling the meeting and sending a video instead.

2. Video feedback
I’ve discussed this one before in a previous blog post (Flipped Feedback) But basically you’ve got two choices. Red pen on a page, or a short video explaining exactly what students have done well, and how they can improve. Seems like a no brainer to me.


1. Demonstrating Knowledge
Enough said (but if you want to know more, check (Learning through teaching)

gif4

So, how could you use video in your school?

Find Your Flipped Learning Workflow

“Flipped Learning is NOT about making videos…” I hear this so often when flipped learning gets discussed. I myself even gave a talk at Flipcon last year with this exact title.

But the truth is, it kind of IS about the videos.

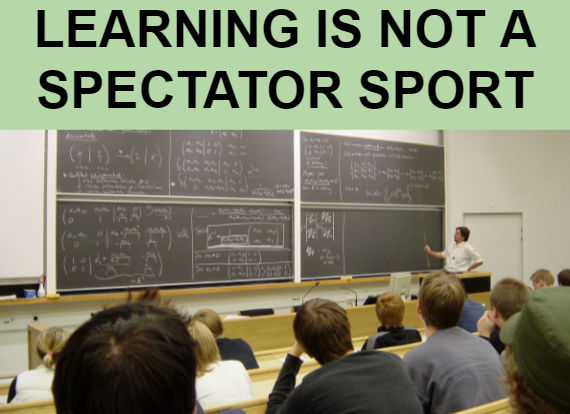
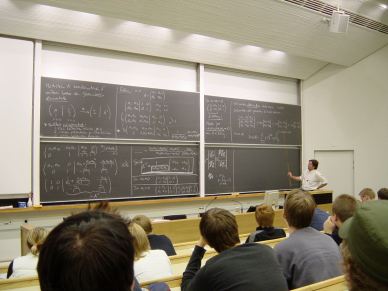
I understand the sentiment. Everyone who flips knows that the real benefit to flipped learning is what happens in your classroom. It’s the extra time you have for collaboration, for 1:1 chats with students, for feedback. It’s the face to face time that really matters!

But what you can’t get around is that when it comes to flipped learning, the new part, the hard part, is making the videos.

The video making bit is the barrier to entry. There are just so many unknowns around it.

  • How do I make the video?
  • Won’t I look stupid on camera?
  • What software do I use?
  • Do I need a video camera?
  • Won’t it take a super-long time?
  • How do I share it with my students?

So… Let me break it down. Here’s what you need on the video side of a flipped classroom:
find your flipped learning workflow
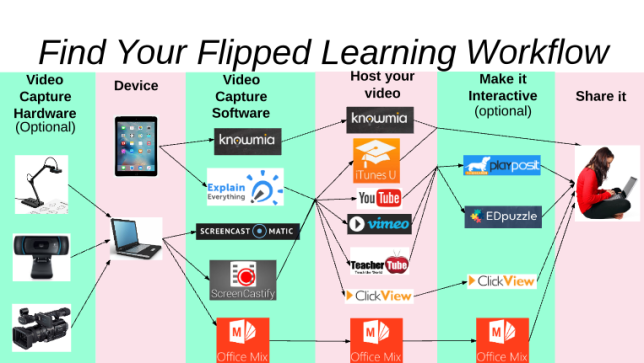
For a “clickable version” of this image, follow this link.

Before you have a look at the options for video making. Think about how you want your video to look. Remember, your students won’t care. Just pick a way that works for you. Here’s some ways that I make videos.

video making styles.gifTo see the slower, video version of the above gif, click this link.

Video Capture Hardware (optional):
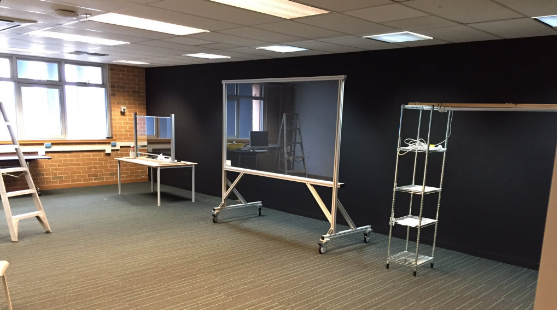
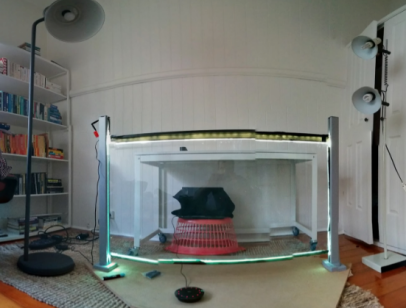
A webcam is usually built into your device (the next bit in the list) so you can use that. I often use a document camera so I can film myself drawing on a real life piece of paper. You can use a dedicated video camera but I feel like this adds an extra step in the process you could do without. I also use a lightboard, as you can see above. If you’d like to build one, click here to find out how.

Device:
You’ll need one of these, but luckily we’ve all got one. Computers all have webcams on them, a tablet does too. You can also use your mobile phone if you’re interested, great for those PE teachers among us who need to capture video in the great outdoors.

Video Capture Software:
Now here’s where things get more interesting. If you’re on a tablet or on your phone you’ll have video recording software built in. Just point the camera at yourself and press record. If you’d like to record your tablet screen instead, there are several options out there: Explain Everything, Knowmia, Showme, Educreations. Pick one and stick to it until you have a good reason to switch.

If you’re on a laptop, I’m increasingly convinced the ONLY choice is Screencastomatic. It’s free, or you can spend $15 a year to get the bells and whistles version (I recommend!). It will record your screen, your webcam or both at the same time. The paid version also has amazing editing features. If you’d like to learn how to use Screencastomatic, I’ll teach you how here. Of course, for the sake of balance, you can check out its poor cousin Screencastify. A selling point of Screencastify is that it will work on chromebooks, so if you happen to use one of those, Screencastify is for you.

If you think your videos are going to be PowerPoint-style videos, you could also consider the microsoft add-on Office Mix. I don’t roll that way but it works and, if you refer to the diagram above, solves hosting and interactivity for you as well (more on that further down).

Now that you’ve got the first three steps done, time to make a video.

filming.gif

Host your video:
So your video is made. Now you need to put it on the web so your students can watch it. Some options, in no particular order are: Itunes U, YouTube, ClickView, Vimeo, Office Mix (if you made your video with it).

Your school, State or district might have another option as well. Here in QLD schools, we can use EdTube. Schools with an LMS like Moodle, Blackboard, Canvas, Haiku etc also usually have hosting baked in.

If you’re not sure, politely ask your IT department which of these options would work for sharing videos to your students.

Making your video Interactive (optional):
If you haven’t seen what websites like Playposit or Edpuzzle can do with video, I definitely recommend taking a look. Videos become interactive lessons, with embedded questions creating greater engagement and allowing you to get information on students’ understanding of the content.

Playposit Example
Playposit demo gif.gifClick here to experience that lesson in full

That said, I actually don’t use them in my classroom. I find they add more time to my process without enough added benefit.

You should definitely check it out though, you might love it!

ClickView actually has this interactive quiz thing baked into their hosting, which makes things a bit easier.

Sharing the videos with your students:
Now you just need to get the link to the video/interactive lesson to your students.
If you have an LMS, sharing these links should prove pretty easy.

In the past I’ve shared a Google doc with classes at the start of the term and added links to new videos and resources as the term progresses. Sort of like a live Hyperdoc. You can see one of mine here.

Now, I use the all new Google Sites to create a website to host all my videos on. You can see what my website looks like here. 

Whatever you choose, it should be a single clearing house where students can continually come back to over the term and find the videos they watched weeks ago.

Resist emailing the videos every day to your students. They get lost in the mess of the inbox.

In Conclusion
After all that you might be feeling more confused than when you arrived here. Sorry about that. But please remember this.

YOU ONLY NEED ONE WORKFLOW. Find what works for you and do that.

Once you’ve got your workflow sorted,  it’s really not about the videos.

Until then, it still kind of is.
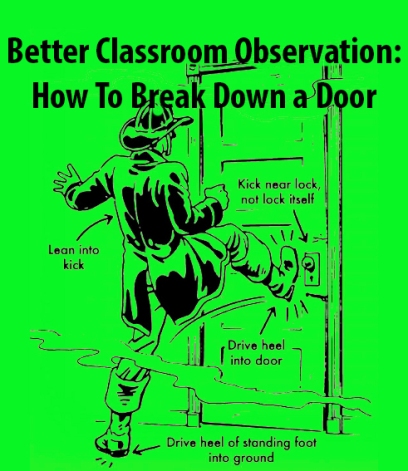
My Class of Guinea Pigs

Question: Is it unethical to perform experiments on students?
Not the kind that would turn them into a comic book superhero or supervillain. Slightly less harmful but experiments all the same.

As a technology coach, it’s my job to help teachers use technology in meaningful ways in their classrooms. Sometimes that means going out and finding new apps. Sometimes that means finding new ways of using old apps. I search high and low for new websites, new software, new hardware. Everything. And it’s always changing!

I also need to put myself in the shoes of every teacher on staff (about 130 at my school). I need to try my best to think like an english teacher, a science teacher, an art teacher, a woodwork teacher. Each of these teachers is a unique snowflake, as I’ve mentioned here before. 

In my fairly short career I’ve been a maths, science, digital technology and accounting teacher but nothing else. This means the last time I was in an english or humanities classroom I was sitting at the short desk, doing my best to pass.

So how can I know whether certain techniques, apps or websites will work “in the wild”?

I turn to the people in the school who have the most current and widest experience across multiple faculties: The Students.

My class of guinea Pigs

Typically, I walk into my class and I say “Class, I have this cool idea/new app/ website but I don’t know if it really works in a real classroom or if teachers would find it handy. Can we test it out?”

Now they’re interested. Not only are they interested in the new learning they are about to undertake, but they’re interested in how we’re going to learn it.

Afterwards, we get to discuss not only the new learning, but also how it was delivered. As a result, my students are really reflecting on their learning and the method in which they’re doing it.

In the process of doing this kind of Beta testing with my class, they’ve also learned a lot of “educational lingo”.

Students say things like:

Prism Scholars Lab really allows for good collaboration

“This Self-grading Google Form allows us to get immediate feedback

“The scaffolding in these questions works really well to prepare you for the harder ones”

Students can also tell me which subject they think it works best in and why.

I’m a big believer in “pulling back the curtain” when it comes to education. If our students know a little bit about differentiation or scaffolding or bloom’s taxonomy or growth mindset, that can’t be a bad thing.

Experiment on your guinea pigs today.

p.s. I know usually my posts are gif laden. I don’t want to let you down.

guinea pig.gif


Why Learning to Code Doesn’t Suck Anymore

Learning to code image.PNG

Coding has always been notoriously difficult to learn and to understand. For the longest time, coding looked something like this.

Coding simulator gif.gif
Now that’s just some gibberish code created using http://hackertyper.net/ (try it out, great practical joke) but most of us wouldn’t know whether it was or wasn’t.

The reason that learning coding has been so difficult for so long is that you were actually trying to learn two things simultaneously.

  • The Logic of Coding
  • The Syntax of Coding

I’m actually mildly amazed that anybody ever managed to learn the Logic of coding while also navigating the unforgiving Syntax of Coding.

  • Should it be {curly brackets}, (round brackets) or [square brackets]?
  • Should I use a semicolon ; or a colon : ?
  • Is it a forward slash / or a backslash \ ?

A REVOLUTION
Fortunately, we can now decouple the logic from the syntax and start learning coding in a far more organic way. There are other program that do this but Scratch is the most popular and it’s what I use.

Take a look at this “coding” that I’m doing.
Recording #215.gif

So what we end up with is code, or put simply, instructions, that look like this.

simple code


So when the green flag gets clicked, Something will point in direction -90, wait 1 second, move 30 steps, wait 1 more second, then point in direction 90.

I still don’t know what that looks like, but it’s easy to read. Lets run our program and see how it looks.

Cat moving.gif

  • So the green flag gets click,
  • then the cat points left (that must be what -90 means)
  • Then he waits 1 second
  • Then he moves over a bit (doesn’t seem very far, but it must be “30 steps”)
  • Then he waits again
  • Then he points right (that must be 90)

This is what learning to code is today. No brackets or backslashes or horrible error messages.

Immediate Feedback
Here I’m learning only the LOGIC of code and getting instant feedback on whether my logic is correct. Either it works the way I intended or it doesn’t. This is high quality feedback, the kind that real learning depends upon.

But why teach coding?
I’ll let you in on a little secret. Computers are breathtakingly stupid.

A computer will only do exactly what you tell it to do. Nothing more and nothing less. Breaking a problem into a series of steps that a computer can understand and execute requires clarity of thought and communication.

An algorithm written by a human to instruct a computer to  do something beyond human capabilities is a thing of beauty.

Binomial-Gif
A coin flipping algorithm allows this cat to flip 6 coins 100s of times in a few seconds and plot their relative frequencies on this polygon.


Hexagon drawer.gif
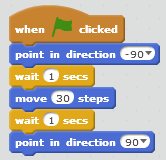
What we’re looking at here is an iterative program allowing 100s of hexagons of increasing size and changing colour to be drawn in moments. It is art from the mind of a human but only made possible by the power of a machine.
3 little pigs gif.gif


A classic story being acted out with the help of a few sprites and a few lines of computer code.


In Summary
Coding is not what you remember it to be. It doesn’t suck anymore.


How To Build a Lightboard On a Budget

Just to pre-empt the inevitable question; No, I am not writing backwards.

That’s always the first question but I also get a lot of others about my lightboard. Hopefully I can answer a few here.

The building started after a good natured challenge was thrown down by Jeremy Lecornu at Flipcon Gold Coast 2015. Five days later I’d gathered all my materials, hastily threw my lightboard together and posted this.

Lightboardrace.gif

Not exactly usable but I continued tinkering and playing with it, the lightboard moved from my spare room to a classroom in school and we’re now making videos that look more like this.

Lightboard final.gif

So, how do you build one? Quite easily as it turns out. Before you start though, Here’s what you’ll end up with.

lightboard built.PNG
I know it doesn’t look like much, but the video you’re looking at above was recorded on that exact piece of equipment (only difference was where it was)

Parts

  • MDF Board (longer than 1200mm, width of 600mm or above will do) (um… $20?) (later on I created a proper set of legs for it, your carpentry skills will vary)
  • Glass (1200mm x 760mm x 12mm((starphire is the best) (cost me $120 from an aquarium builder but any glazier knows what starphire is)
  • pool fencing legs from bunnings. ($100 for the pair)
  • Strip LEDs, (you need them to have a dimmer attached) (I paid $100 but I think I overpaid)
  • Duct tape. (actually, tape that is black on both sides is better. Electrical tape should do it)
  • Expo Neon markers.  ($12)

Extra Computer stuff.

Method:

  1. Bolt your pool fence legs to the MDF or whatever base you chose.
  2. Put the glass in between the pool fence legs. (I hope you measured twice!)
  3. Put LED strip along the top of the glass facing into the glass and tape it down
  4. Put black tape along the bottom of your glass to stop light escaping and you’re done.

Filming

filming booth.PNG
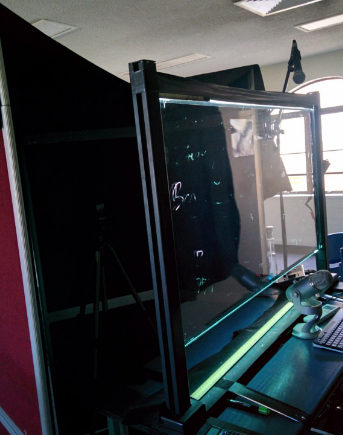
Film in a really really well lit room. Most people make the mistake of thinking darkness. That’s wrong. Instead, all surfaces around the lightboard should be black. This will kill all those pesky reflections. Here’s how the lightboard “filming booth” currently looks in the school.

You’ll also want to dim your LEDs so that the writing still “pops”, but also so that the colour doesn’t get lost. Too bright and every little smudge shows up in your video, too dim and the writing is hard to see.


Lightboard Mark 2

When it came time to build our second our second lightboard we did things a tiny bit differently.

You can actually buy mobile glass boards straight off the shelf. We bought ours here.

Off the Shelf clear glass board

This works quite well, although the glass is not as transparent as the starphire I used in the original build. This leads to the LEDs not penetrating evenly through the glass. This is still a workable solution and we’re quite happy with the result.

If you’d like a third option, Our friend Jeremy Lecornu of Brighton Secondary school in SA made a massive one after first making the small one in my tutorial. (small one on the left, large on the right)

lightboard.PNG

He used these plans and had it built by a company called 80/20 http://www.8020.com.au/

Be aware that this is not a budget solution but, as you can see, it gives you a very professional product!

Of course, we were not the first to build lightboards

I first came across the lightboard at this website. My opinion on that particular lightboard setup is that, in a busy school, the requirements for post production and lighting setup etc are just too costly and time consuming.

If you’d like to see how easy it is to use our lightboard in a previous blog post I explain how fast you can make a video using the lightboard.
So that’s how we built our lightboard. You can build one too!


Learning is Not a Spectator Sport

learning is not a spectator sport.PNG

In this week’s blog: Podcasts, Learning as sporting event, Ex-Student Olympians, How I disappointed my Pre-Service teacher and why I’m teaching less and less.

This week I’ve been making the daily commute just a little more productive by listening to podcasts. @mrdzito recommended I check out BBC 4’s “The Educators” and I was instantly hooked. Just people talking about what their passion is in education.

Looking for a familiar name in the list, I happened upon an episode with John Hattie of “super huge meta-analysis/195 influences/effect sizes” fame. The interview was a fascinating one and gave a lot of context behind what most teacher have heard a lot about.

Over the course of the interview John was asked about how much teachers should talk. Rightfully, he said “it depends”. But he also said:


“Students shouldn’t come to school to watch the teachers work” 


The boys school I teach in is a bit sports mad. For many, the dream is to one day represent the school in the 1st XV Rugby team. Maybe even the Wallabies.

This means I inevitably draw parallels between the classroom and sports.

Math exercises = training
Group work = Team work
Exam coming up = The Big Game

So in this world, I’m not really their teacher. I’m their coach.


So how does a coach give his players the best chance of success?


With Rio coming up in just a month, I’ve got a very special interest in one particular event. The Decathlon. Representing Australia will be an ex-student of mine, 21 year old Cedric Dubler.

Cedric, apart from being a hardworking and talented sports star, is also a keen videographer and vlogger. In the lead up to the games, he is posting weekly videos that chronicle his training each week. It is really fascinating viewing.

The interesting thing about these videos is watching Cedric train. Throughout the video series you’ll catch glimpses of Cedric’s coach keeping a watchful eye over things. But for the most part…


It’s the athlete that’s doing the work.


I had a pre-service teacher come to visit my classroom a few months ago. As usual, my students walked in, pulled their laptops out and started working on wherever they were up to. Small groups of students started working together, some individuals were watching video lessons and I was having small group or one on one discussions with students. The bell rang, I checked in with individuals as they walked out and the lesson was over.

Critically, at least in the pre-service teacher’s mind, I didn’t once address the entire class as a group.

In our debrief, the pre-service teacher had quite a few questions about the weird scene she’d just witnessed. But in essence, what she really wanted to know…

“Why don’t you do any teaching?”

Because I’m a teacher, I should do lots of teaching right? You know, teaching? It looks like this.
Math_lecture_at_TKK.JPG

Is it possible, that if I teach less,  my students will learn more?